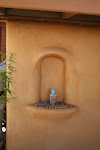
As you can see over the last week the guys from Merimbula Metal Roofing have fitted our roof, which looks absolutely amazing.
Adam was an absolute champion. Him and his boys, as well as doing the roof, helped out with attaching the bottom flashing as well. This should stop any moisture creeping into the bales from rain & water hitting the outside walls. They did a great job. What is very note worthy is that Adam attached all the fascias & guttering & arranged the flashing job while he was on his way to his wedding in QLD. Thanks again mate & congratulations.
Also a big thanks to Chris Clements & Bluescope Lysaght Batemans Bay for the supply of the roof sheets & gutters. Chris was really quick with getting our order through & pushed hard for an early delivery as well. Thanks Chris & Bluescope Lysaght Batemans Bay.
Sunday, October 31, 2010
Monday, October 25, 2010
Rendering Preps
Today's job was getting the walls straight & ready for rendering. This involved beating the bales with the 'persuader' & giving the walls a haircut with the hedge trimmers. They really come up straight & clean after a bit of work, as you might be able to see. We also fit the electrical socket points as well. This was also a sad day for me as I had to leave site to come back to my 9 to 5. The house is now in the hands of Frank, heaven forbid, & the roofers who start on Wednesday, weather permitting!?
Sunday, October 24, 2010
Roof Trusses - Day 5
Saturday, October 23, 2010
Roof Trusses - Day 4
Today was my day off until in start to, lets say piss down with rain! I had the morning with Mel & the kids. We came home to have a much deserved arvo sleep when it came bucketing down. I jumped in the car and got out to site to help Frank & Hardy cover the bales just in time to keep them safe and dry.
Friday, October 22, 2010
Roof Trusses - Day 3
Thursday, October 21, 2010
Wednesday, October 20, 2010
Roof Trusses - Day 1
Found a great builder to help us put up the trusses. Ian Gowing of Jellat Jellat was a great bloke to work with. He worked well with Frank on site, which I could only assume would be hard for any builder, but also did not mind me and Greg laboring for him. A good tip for keeping costs down too. The first day went smooth, as you can see from the photos.
Tuesday, October 19, 2010
Straw Bale Working Bee - Day 6
Today the last of top plates on. Now its a matter of compressing the bales and screwing off to the vertical window and doors frames.
Compression is achieved by the steel compressions plate you can see across the top plates. The threaded rods are pushed through the ply skin and then through the steel plate. We then cut the excess off the threaded rod and secure, finger tight, to the steel / compression plate with a washer, spring washer & nut.
When all the compression plates are in place & we have cut off the excess rod we measure from the top plate to the floor in a number of points around the house. We then find the lowest point & then tighten down all other points to this measurement. For Example, our lowest point was 2865mm. So we tightened down every point to 2865mm making sure we were level across the top plate with a spirit level. This should get the top plates to an even and level height around the house.
Note: You should not progressively screw the plates down. Try and have as many teams as you can at different points of the house. This will stop pre-loading at one side of the house.
.. Now, this is the hybrid bit of the build. Where the window & door frames are coming through the top plates, next to the noggins, we screw or bolt through the vertical frames. This, therefore distributes the load onto the bales through the top plates and onto the frames which are connected to the bottom plates and slab. The excess off the window frames can now be trimmed off with a chain saw so they don't get in the way of the roof trusses.
Monday, October 18, 2010
Sunday, October 17, 2010
Saturday, October 16, 2010
Friday, October 15, 2010
Thursday, October 14, 2010
Wednesday, October 13, 2010
And Now the Fun Begins - Day 6
Today, we started bolting down the bottom plates. From our engineering plans, we could not be greater than 900mm between noggins / bolt down points.
Dad had manufactured some brackets out of recycled 5mm, 50 x 50 angle iron I found in a scrap metal bin. They were cut 90mm in length, same as the noggins on there side, the drilled and counter sunk to house a 14g 50mm batten screw. We then sprayed it with rust proof paint.
Before we start, at each end of the bottom plate we place a piece of 5mm fibro or blue board under the bottom plate. This allows a gap for any moisture in the bales to drain out.
Dad had manufactured some brackets out of recycled 5mm, 50 x 50 angle iron I found in a scrap metal bin. They were cut 90mm in length, same as the noggins on there side, the drilled and counter sunk to house a 14g 50mm batten screw. We then sprayed it with rust proof paint.
From each separate bottom plate we measured in 450mm from the ends & placed a noggin on its side. We then measure 900 from the centres of these noggins to get our next tie down point. We used 125mm 12 Ø Gal dyna bolts. This allowed 75mm into the slab, which was required from the engineer.
We then need to fill up with 20mm aggregate. Mel did a great job at this. The stone is in there to help with drainage of moisture.
Tuesday, October 12, 2010
Monday, October 11, 2010
And Now the Fun Begins - Day 4
Sunday, October 10, 2010
And Now the Fun Begins - Day 3
Today, Dad & I got in and cleaned out the shed and carport for the arrival of our straw bales which are due in 2 days. It was a bit of a job but we got it done & was then able to continue on to finish the Top & Bottom plates. Here are some more progress pictures;
Saturday, October 9, 2010
And Now the Fun Begins - Day 2
Today we kept on with the top & bottom plates. Getting onto a bit of a rythem. I have discovered a great place to purchase all my timber from with the best bucnh of blokes to deal with. North Eden Timbers. If it was not for these guys I would have struggled to get as rar as I have so far. Thanks for your help and I am sure its not the last they have heard of me. I have some more progress picture below. Enjoy;
Friday, October 8, 2010
And Now the Fun Begins
Subscribe to:
Posts (Atom)