Wednesday, November 30, 2011

Eaves

We had Ian Gowing back on site to do our eaves. We are really happy we persisted in raked eaves. I think they look great and Ian did a great job!

Saturday, October 22, 2011

Another Visit

Headed down the coast, with the kids, to meet a few people on site and a bit of cleaning. Been run about so not much time for a tidy up of late. Had the plaster in who fixed our outside areas & plastered them. Spoke to Ian Gowing about getting our eaves put up & even managed to sell some let over bales and tidy up a bit.


Monday, October 3, 2011

Outside Ceilings & Gardening

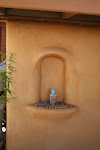
I went down over the long weekend with Mum, Dad & the kids to batten the outside areas and a bit of extra work. We got up all the battens & insulation for the front and back areas. We also sheeted the front alcove. Mum got the window sills sanded and a 2nd coat of seal on them. We also did a massive tidy up, moving pallets to form a compost area, spreading more straw over the batter which should break down with all the rain we have had, cleaning up timber piles, rubbish dumps and laying bales out to stop water flowing toward the house. Have a few pics for this trip, just so much getting done and so much to do!


Sunday, August 28, 2011

We Are Painting

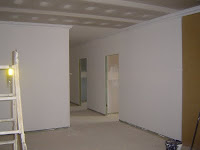
We went down with the kids over the weekend to have a look at our new plastered walls. They look amazing. Really makes it look like a home. We went down to paint the walls with there first coat of sealer. Really comes up great with just the undercoat on the walls. Trav & Beth helped out with the painting & Trav also helped with taking some photos. The kids really kept them selves entertained and were really excited to see their rooms and the house as they had not seen it with the internal walls up. Thanks to John at Inspirations Paint & Accessories for supplying our paint. Very friendly people out there that know there stuff. Thanks.


Thursday, August 18, 2011

Biolytix Blunder

If you have been keeping track of this blog for long you will realise in the early days I would rate highly the Biolytix Sewage System. So much so, we went out early & purchase a system in full with free irrigation hose, a great offer & could not pass up. The Biolytix cost over $7,200.

At the beginning of this year, Biolytix Australia went into liquidation and we ended up loosing our system & our money. The thing that has upset me the most now is that the Australian leg of Biolytix was purchase by New Zealand Biolytix. They are now trading, in Australia, again. Same system, same name but no supply of systems or money back to anyone that lost out.

I really do like this system. I think it is the best going round but I do not like the Biolytix business ethic. I have contacted Biolytix NZ to see if they were going to help out the people, including myself, who lost out in this Biolytix Blunder but have had absolutely no response from them. If they are going to buy up the remainder of Biolytix Australia & then trade back in Australia, under the same name, then I believe they have an obligation to fill or refund orders lost. At least offer some sort of decent discount on a new system for people that have lost out.

There is no Biolytix news for me or the other customers that lost out any time soon which puts me up s**t creek without a sewage system!

Wednesday, June 22, 2011

We Are Starting Our Plaster Work

Just wanted to give a wrap to Col Searston Plaster & Peter from Sapphire Plaster. Both of these guys so far have gone above and beyond with helping us on our house.

Peter has been out a few times delivering plaster board, showing us how to apply it on the walls correctly, delivery of battens & metal corners. Great guy and great service.

Col has also been out to quote, show us how to put up battens & insulation. He is starting next week, Monday, so cannot wait to see the transformation with the insulation, plaster board & cornicing up.

Thanks again to Col Searston Plastering & Peter at Sapphire Plaster for all your help so far.

Saturday, June 11, 2011

Ceilings & Window Sills

Went down over the weekend to start putting up the battens & insulation for the ceiling. Did not get it all done but about 80% there. Our plasterer, Col, is going to help out with finishing off. We had some help over the weekend from Frex & Dad with the ceiling and Mum with the window sills. Corine helped out as well as we had a problem with the walls. Here are some photos.


Monday, May 9, 2011

We Have Solar

We have our solar panels installed now. I was down over the weekend to fix the power box and watch them finish our solar panel install. Also fitted the last do lock too so the house is now locked up. It's nice to be generating some power too.


Monday, February 28, 2011

Gyprock & Plastering

Over the past few days we had been putting up the Gyprock. Peter from Sapphire Plaster measured up, supplied, delivered & gave us a 30 min run down on hanging the Gyprock. They are a good bunch of guys at Sappire Plaster. Worth a look if you are doing any ceilings or walls in the area. Stud Walls & Gyprock going in.


Friday, February 25, 2011

Internal Walls & Render

Mel, Dad & I have been down to put these internal walls to bed. They are coming together pretty quick after the first stuff up. My fault for not listening to everyone I suppose. Here are a few photos of us putting up noggins etc. Thanks again so much for Mum looking after Travis & Bethany again & also Dad for coming down for the week to sort out the walls. We owe you allot for the help you have given us.


Sunday, January 23, 2011

Internal Walls Going Up

Mel, Dad & I have been at the property over the weekend putting up the internal stud walls. Mum looked after the kids for us again, we owe them alot after this has finished. We were using 90 x 35 T2 timber. Marking out the walls from the plans and then dyna bolting the timber or 'bottom plate' to the floor. Then, using a plumb bob, marking along the roof trusses where the 'top plate' will go. Then, cut out your vertical lengths and 'skew nail' them in place. I heard a good tip before starting the verticals and that was to cut them a little longer than they need to be. They will jamb in-between the top and bottom plates and they are easier then to get square and secure. It becomes a one person job instead on one person holing while the other nails. Check out the photos below.